Showing posts with label sewing. Show all posts

Saturday, August 21, 2010

Quilt Step Seven: Hand Quilting

Disclaimer: I am in no way a quilting expert. I have learned solely from trial and error (emphasis on error) and reading on the internet. I have only made 4 quilt tops and have hand quilted 1 top and machine quilted 4 tops. I am not saying everything I do is the right way to do it, just sharing what I've picked up so far. You'll probably learn best by trial and error too ;-)

Now that I have my quilt sandwich assembled, it's time for me to quilt this (seemingly bigger each day) quilt. This is only the second time I've hand quilted anything, but it's already much easier this time around and I can tell my stitches are getting a lot better.

The first thing I had to do was decide what pattern I wanted to quilt. I wanted to keep it simple and relatively sparse both so it would go quickly and so I could avoid as many seam allowances as possible (it's a lot harder to quilt wherever there's a seam allowance because you have extra thicknesses of fabric). For the quilt batting I'm using, the packaging informs me that the ideal quilting distance is 2-4 inches apart, so I thought about what I wanted to do and then made sure that design wouldn't be too spaced out.

I also needed to get all of my stuff together. I use Gutermann quilting thread for hand quilting, and quilting needles (also called "betweens"). I keep scissors close by along with a thimble (though I don't use it the whole time...they drive me crazy) and one of those rubber grips used to help open jars to help me grip the needle if I need to pull it through a thicker section. The last thing I have on hand is some sort of tape that won't leave sticky residue on the fabric.

Then, it was time to quilt. As always, start in the center and work your way out. Here is my center square with the hoop already on the quilt (making sure the backing fabric didn't have wrinkles in it). The pink threads you see are the basting lines I put in to hold everything together temporarily (I will just cut those out when I'm done quilting), the white threads are my quilting lines. I chose white because it matches both the top and the bottom of the quilt. My technique's not quite good enough to make the quilting part of the quilt design yet--I just want it to blend in. One thing about quilting that was always a mystery to me was how to do the quilting without have all of the thread knots hanging out. My sister-in-law explained it to me in an email and with my mom's help, I finally figured out the technique. You start out by tying the knot in the end of your thread. Then you put the needle only through the top layer of the quilt just a short distance away from where you want to start and push the end of the needle up through the place you really want to start. Pull the thread until the knot pulls through the first hole, but not the second one. Now you're ready for the quilting stitches. Hold the needle in your dominant hand with your other hand under the quilt. With the needle vertical, push it through all layers of fabric until you barely feel the point on the bottom side then rock the needle over horizontal to the fabric and push it through. Most people use a thimble on the finger that they use to push the needle. Thimbles drive me batty though, so I only use one if I'm pushing through a seam allowance (which is hard to do). Otherwise, I tend to just push the needle with my fingernail. This wouldn't work if I was quilting for hours at time (it would get to be too much stress on my nail and start to hurt), but I like frequent breaks anyway, so it usually works fine.

Pull the thread through and voila! (random pet-peeve of mine..."wah-la" is not a word) your first quilting stitch. I still do my stitches separately, but you can keep up this process (when you rock the needle to the side, turn it back vertical as soon as the point comes through the top and do another stitch) so you get several done at once. You'll also notice my oh so lovely princess tape. I think I've briefly mentioned this trick that I saw my sister-in-law using, it just gives you a guide for making a straight line of stitches. Medical tapes work well because they don't leave the fabric sticky. The last time we bought tape was to bandage up a crushed finger injury of Sierra's (note to all the kiddies out there...sticking your fingers in the hinge side of an open door is a BAD idea), so what I have is princess themed.

At the end of your line of stitches (or the end of your thread, whichever comes first), you will also need to hide an ending knot. Make sure you stop when there's still enough thread left to tie it off. Wrap your thread around the needle then pull the needle through to make a knot. Just like when you started, stick the needle through the top part of the quilt only and push the point back up a short distance from where you're stopping. Pull until your knot is pulled through the fabricthen cut off the thread close to the fabric.
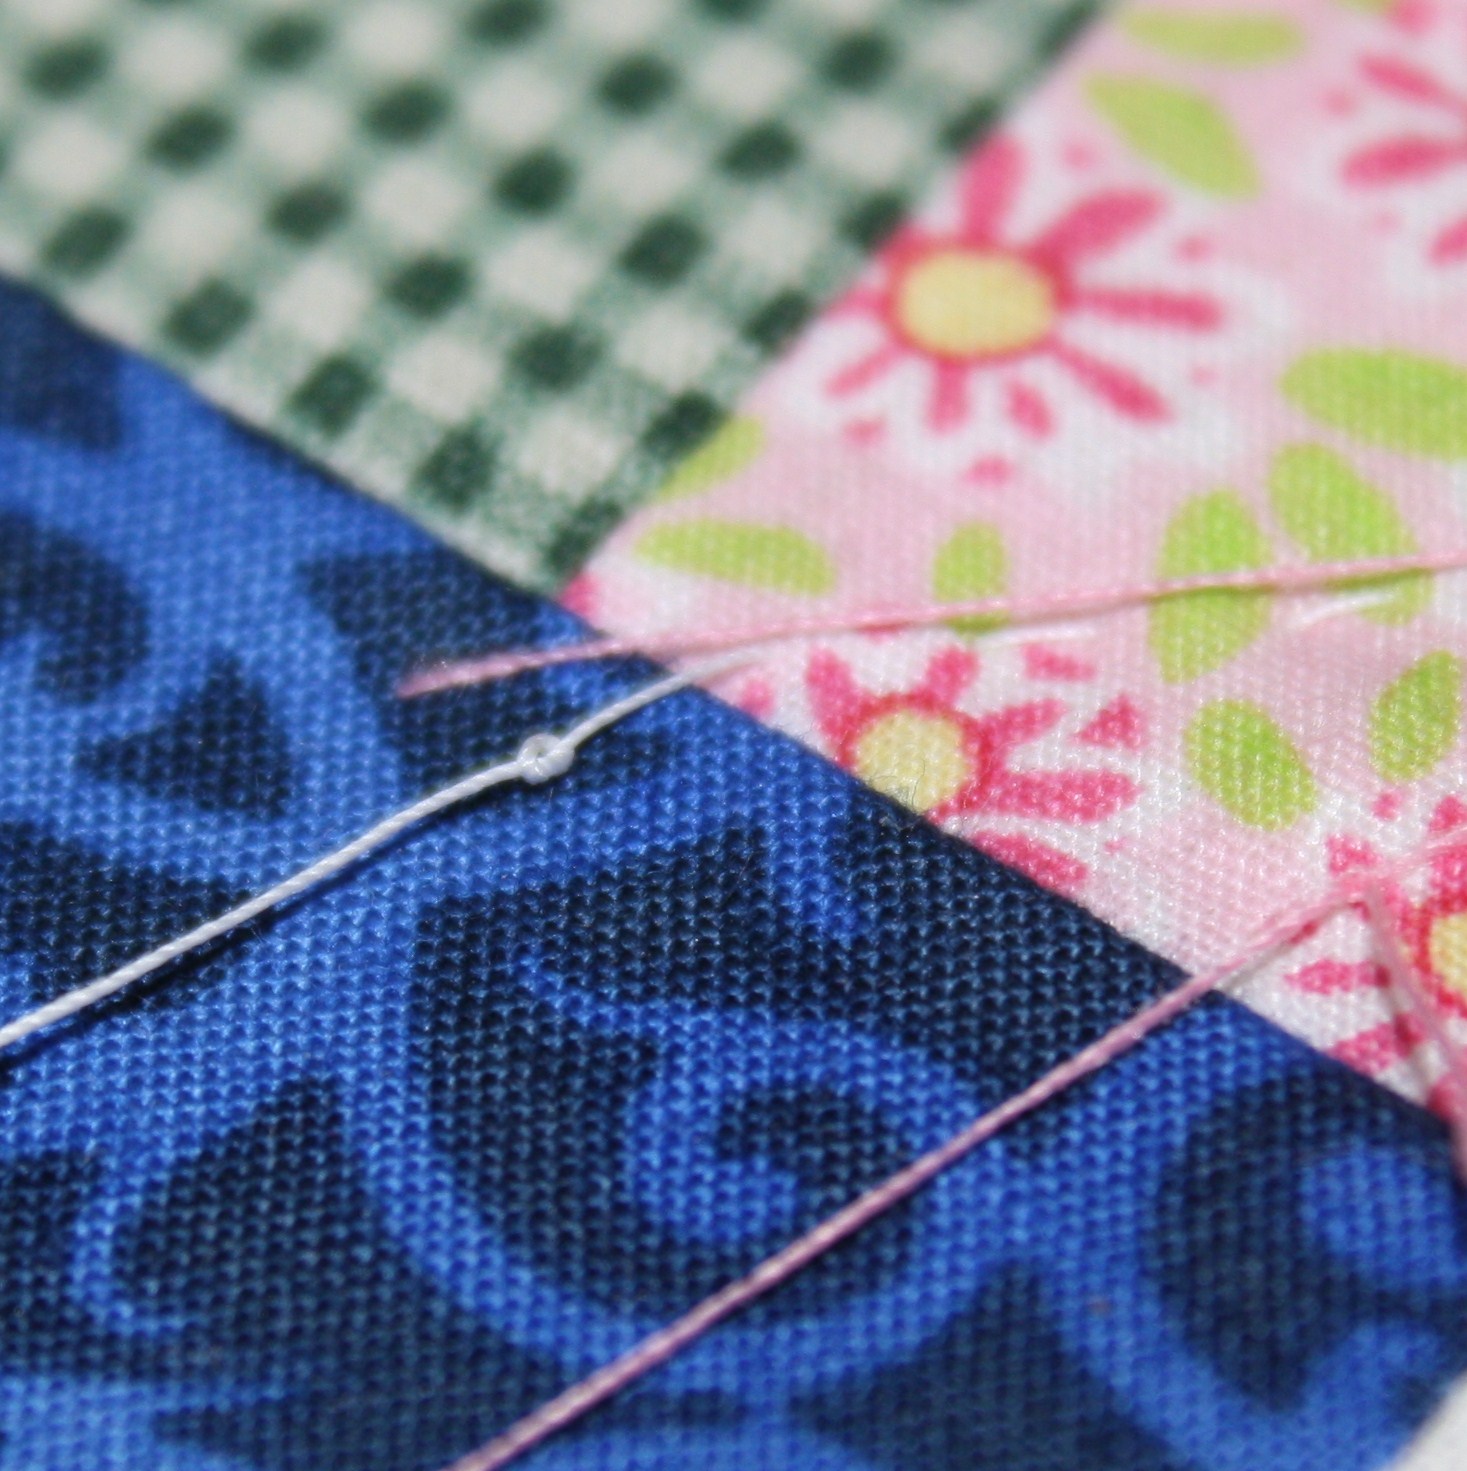
The design I ended up choosing (actually, Josh came up with it because I was having trouble coming up with something I was happy with) looks like this on all of the white sashing strips plus I'm doing an "x" in all of the center squares. Right now I have 4 squares done, only 109 to go...yay.
I also got the batting for the other quilt in the mail yesterday, so I will be starting that next week. It will be machine quilted, so I'll do another post about setting up and doing that.

Quilt Step One: Planning
Quilt Step Two: Cutting Fabric, Preparing Machine
Quilt Step Three: Piecing The Quilt
Quilt: Piecing, Continued
Quilt: More Piecing
Quilt: Scrap Happy Blocks Pieced
Quilt: Spindrift Pieced
Quilt Step Four: Sashing
Quilt Step Five: Border
Quilt: Choosing Batting
Quilt Step Six: The Quilt Sandwich
Quilt Step Seven: Hand Quilting

Monday, August 16, 2010

Quilt Step Six: The Quilt Sandwich

Disclaimer: I am in no way a quilting expert. I have learned solely from trial and error (emphasis on error) and reading on the internet. I have only made 4 quilt tops and have hand quilted 1 top and machine quilted 4 tops. I am not saying everything I do is the right way to do it, just sharing what I've picked up so far. You'll probably learn best by trial and error too ;-)

I finally decided to hand quilt the Scrap Happy quilt. I will probably be cussing myself over this decision in the near future, but I did have sound reasoning: First of all, I only have the pieces to do up to a queen sized quilt on my machine. I can move up to a king-size, but it would probably cost me about $30 to get bigger pieces for the frame. If I were going to be making more quilts, that would be reasonable, but I don't expect to be making a whole lot of king quilts. Second, I don't have a long-arm quilting machine, I just have a nifty frame that allows me to quilt easily on my regular machine. One drawback to it is that as you go along (and more material is rolled up on the bars....you'll see that with the other quilt as I machine quilt it), you have a smaller and smaller area to quilt at one time. The end result is that the only feasible quilting pattern that I can do with my set-up that won't look totally ridiculous on this quilt is a random meandering pattern done with invisible thread, which I wasn't thrilled about for this pattern. Third, I need to practice my hand quilting anyway.

The first step to quilting is to come up with a backing. Because this quilt is so big, I would need just over 8 yards of fabric to make a back. That gets expensive. Lucky me, my grandmother gifted me several sets of sheets a little while ago. They are perfectly fine and were still in the package, but they are many decades old and apparently mattresses are thicker now, so the sheets don't really fit well. We had been using them on the girl's bed, but we have other sheets that work better. So I picked out a set that I think compliments this quilt pretty well and decided to use that as my backing fabric. It's free! It's scrappy! It's perfect for Scrap Happy! Now, ideally, I would have put the seam of the back down the center of the quilt (or patched four big squares that were centered, or something else along those lines). Frankly, I'm getting big and pregnant and lazy and the only centered option I could come up with was to lay my flat sheet diagonally and then cut up the fitted sheet to fill in the four corners, then make sure it was all centered. Blah, to say the least. And I risked messing up and having to start all over again in my quest for cheap fabric. So I opted to do a totally not centered seam. Slightly tacky? yes. County fair worthy? no. But it'll keep us just as warm in the winter, so I went with the easy option.

So without further ado, here is a picture of the sheets I'm using:

I ripped out the seam that made a wider border at the top of the sheet so that I had a little more fabric to work with, and I cut the elastic and corners out of the fitted sheet. Then I laid out quilt top to see how big I needed the backing to be (your backing should be bigger than your top), and sewed the flat sheet and fitted sheet together and pressed the seam open.

With that done, I cleaned a section of the floor really well and laid out my backing wrong side up:

I smoothed it out as best I could and taped the corners to the floor (without stretching the fabric). I put on a pair of clean socks when I needed to walk on it to minimize the dirt I tracked in.

Next, I laid out the quilt batting and again, smoothed it as best I could and taped the corners down:

And lastly, it was time to lay the quilt top down, right side up. Again, more smoothing (no tape this time though):

With all my layers sandwiched together, I walked the edge of the quilt and made sure the backing and batting were bigger than the top all the way around (these get "pulled in" as you quilt).

Then it was time to baste. You need to baste your layers together so you can move the quilt around and keep everything together. Some people use large safety pins for this, but I'm sure I'd stab myself numerous times doing that, so I stick with sewing. This was by far the biggest quilt I've ever sandwiched together, so I was doing a "fly by the seat of my pants" type thing, but what I ended up doing was finding the middle of the quilt (always start with the middle) and safety pinning that, then working my way out from the center, smoothing the fabric as I went, and pinning the middle of each edge and the corners.

With everything temporarily held together, I picked a thread color I could see easily (a bright pink in this case) and sewed basting stitches that started from the center and went out to each edge horizontally, vertically and diagonally. Then I basted all around the outside edge. To make it go a little faster, I left my thread attached to the spool while I was sewing each line (so I didn't have to keep starting new pieces or dealing with LONG threads).

Once all the basting was done, I took out the safety pins and trimmed up the extra fabric a bit:

Here is an up close shot of one of the corners with the basting in:

I went ahead and put my hoop on (again, a frame would be easier, but I don't have one without spending that $30 that I don't want to spend) and folded up the quilt to put away. I will start quilting it tomorrow and will take pictures as I go, so a post on that is coming up in the next few days. (along with a post about all those frame looking things in the living room...that's Josh's "man-nesting" project, the bunk bed he's building the girls)

Quilt Step One: Planning
Quilt Step Two: Cutting Fabric, Preparing Machine
Quilt Step Three: Piecing The Quilt
Quilt: Piecing, Continued
Quilt: More Piecing
Quilt: Scrap Happy Blocks Pieced
Quilt: Spindrift Pieced
Quilt Step Four: Sashing
Quilt Step Five: Border
Quilt: Choosing Batting
Quilt Step Six: The Quilt Sandwich

Saturday, August 14, 2010

Quilt: Scrap Happy Pieced!

I finished piecing the scrap happy quilt!!! There is no additional border on this one, so it's ready to quilt now (as soon as I decide what I'm doing for the back). You don't really appreciate how big a king-size quilt is until you're doing that last bit of sewing and ironing that joins everything together!

Here is the whole quilt:

And here is another close-up of what the individual squares look like:

Edited to Add: If you got here from the We Did It! or Quilt Story Linky, Welcome! I have been doing a series of posts since February so everyone could follow along as I made 2 quilts. The other quilt top along with links to each step of the process can be found here. I've got my backing fabric figured out and will be posting by the end of the week about setting up for the actual quilting part. Enjoy!
Fresh Poppy Design

Tuesday, August 10, 2010

Quilt: Choosing Batting

Disclaimer: I am in no way a quilting expert. I have learned solely from trial and error (emphasis on error) and reading on the internet. I have only made 4 quilt tops and have hand quilted 1 top and machine quilted 4 tops. I am not saying everything I do is the right way to do it, just sharing what I've picked up so far. You'll probably learn best by trial and error too ;-)

Believe it or not, there is no fabric or craft store where we live now. Rather than drive an hour (one-way) to get to one, I got online yesterday to order batting for the quilt I had finished (I had already picked up king-size batting for the other one when there was a good sale going on several months ago). That reminded me that shopping for batting the first time is overwhelming and it'd be worth doing a post about.

Batting is the middle of the quilt--the part that makes it fluffy and warm. There are a lot of different materials you can choose to use for batting. In the old days, it was old blankets that went in the middle of a new quilt. Today if you are wanting to save money and have fabric laying around, you might use flannel or even fleece. You can buy batting made out of wool, silk and bamboo (no, the bamboo isn't prickly--Josh and I have bamboo sheets that are our absolute favorite because they're so soft). Practically speaking though, most people are making a choice between polyester and cotton batting, so I'm just going to do a quick run down of those two.

Polyester batting has the fibers bonded together with a glue-type substance. It looks fluffier in the package and will "poof" more in your quilt to give a look similar to a store-bought comforter. It's easier to hand quilt, but also works with machine quilting. It is more likely to "beard" (fibers pulling through the needle holes where you quilted) as time goes on though and is not quite as warm in winter or comfortable in the spring/fall.

Cotton batting has the fibers bonded together by "needle punching" instead of glue. Though it's thinner, it will be warmer in the quilt and because of the natural fibers, it will also be more comfortable in warmer weather. The batting will shrink when the quilt is first washed, leading to that antique, puckered appearance on the quilt (which some people like and some don't). You may be able to pre-wash the batting to shrink it before quilting, but I've personally never done this. Cotton batting is fine for machine quilting and experienced hand quilters, but can be difficult to hand quilt because it's more dense. Cotton batting is also more expensive.

You will also need to decide if you're going to buy packaged batting in typical bed sizes or batting by the yard. So far, I've always purchased mine pre-packaged and cut, but I'm beginning to consider buying a whole bolt of batting next time I see a good sale. Whichever you do, be sure that your batting is a little bigger than your quilt top. As you quilt, the batting and backing will get "pulled in" a bit, so they need to be a couple inches bigger than the top you're quilting. The pre-packaged battings take this into account.

So far, I've chosen to use either 100% cotton or 80/20 cotton/polyester blend battings. I haven't had any trouble machine quilting either and even with very very limited experience, I didn't have trouble hand quilting the blend.


Quilt Step One: Planning
Quilt Step Two: Cutting Fabric, Preparing Machine
Quilt Step Three: Piecing The Quilt
Quilt: Piecing, Continued
Quilt: More Piecing
Quilt: Scrap Happy Blocks Pieced
Quilt: Spindrift Pieced
Quilt Step Four: Sashing
Quilt Step Five: Border
Quilt: Choosing Batting
Quilt Step Six: The Quilt Sandwich

Sunday, August 8, 2010

Quilt Step Five: Border

Disclaimer: I am in no way a quilting expert. I have learned solely from trial and error (emphasis on error) and reading on the internet. I have only made 4 quilt tops and have hand quilted 1 top and machine quilted 4 tops. I am not saying everything I do is the right way to do it, just sharing what I've picked up so far. You'll probably learn best by trial and error too ;-)


I finished up the top for the Spin Drift quilt! Only 3 months later than I was hoping for, but hey, it's still before winter time.

Today I finished up the borders. I was wanting to do mitered corners on the borders, but in keeping with the idea of using scraps and saving money, I ended up using fabric that I had just enough of, and there wasn't enough to do a miter. So these are just regular ol' borders.

First, I cut my fabric (a bunch of long, narrow strips) and sewed all the short ends together so that I had one skinny, long piece: Then, I cut that piece into 4 pieces that would fit the sides of the quilt. If you're following a pattern, it will give you the measurements you need here. If not, you'll need 2 pieces that are the same (or very slightly longer for fudge factor) length as the sides of your quilt and 2 pieces that are the same length as the top and bottom of your quilt plus the width of your border times 2

Then, starting with the sides, mark the center of your border piece and the center of your quilt side:Match up these two points, lay the right sides of the fabric together (I always lay the quilt out on my bed at this point) and pin the center of the border to the center of the quilt. A couple of notes here: First, as I've stated before, I HATE pinning. Borders are not the time to avoid pins. Use pins and use a LOT of them. It's a minimal time investment to save you a huge headache. Second, I used to pin things with my pins parallel to the seam until I saw an episode on HGTV that showed someone sewing with the pins perpendicular. I wondered why it was done that way and looked it up...with the pins perpendicular (as I have them in the above picture), you can sew right over them and pull them out later. It minimizes bunching on the fabric, makes it easier as you're sewing, and you prick your fingers less too.

Once the center is pinned together, work your way from the center out to the edges and pin your border to the quilt (again, LOTS of pins). The border is going to help square up your quilt, so you want the border straight, not necessarily following every edge of your quilt. Hopefully you've been careful throughout the piecing and the small errors are still within a reasonable seam allowance. If there are some bigger mistakes, you may need to square up the quilt by doing some cutting before putting the border on.

Sew the border on both sides of the quilt, press the seams, then sew the border on the top and bottom of the quilt and press the seams:
This particular quilt had two borders, so I repeated the whole process all over again for the second one and here is the finished quilt top: Sorry the picture's not any better--the best hanging situation I could come up with didn't leave me much room to back up for a picture plus I had to stand on the bed to take the picture (which my midwife would probably not approve of in the first place), so this is what I ended up with. I think you can definitely get the idea though. The borders are really a big part of this quilt. They calm down the craziness of all those pinwheels and the first one sort of blends, while the second one really frames it. I would like to be able to use that same rose fabric for my binding, but I don't think I have enough left, so I will probably have to come up with something else. This quilt will be for the girl's room though and they have both been coming up to me all day saying how pretty it is, so I guess it's a winner!

It will probably be another week or two before I write up the post detailing the actual quilting and then the binding, but here is the fabric I plan to use for the back: Again, not entirely my first choice, but we're going with what I have laying around. This was gifted to me and I won't use it for anything else, so I'd like to make it work for this. There is just barely enough for it to work--I'll have to be very careful not to waste any of it and even then it may not work out, but I'm sure gonna try!


Quilt Step One: Planning
Quilt Step Two: Cutting Fabric, Preparing Machine
Quilt Step Three: Piecing The Quilt
Quilt: Piecing, Continued
Quilt: More Piecing
Quilt: Scrap Happy Blocks Pieced
Quilt: Spindrift Pieced
Quilt Step Four: Sashing
Quilt Step Five: Border
Quilt: Choosing Batting
Quilt Step Six: The Quilt Sandwich

Tuesday, July 27, 2010

Back to Quilt Piecing!

Disclaimer: I am in no way a quilting expert. I have learned solely from trial and error (emphasis on error) and reading on the internet. I have only made 4 quilt tops and have hand quilted 1 top and machine quilted 4 tops. I am not saying everything I do is the right way to do it, just sharing what I've picked up so far. You'll probably learn best by trial and error too ;-)

Well, getting horrendously sick at the beginning of this pregnancy put a bit of a damper on my quilt making plans. Then, we actually moved to Montana and I realized we need those quilts even in July!! I finally had Josh set up my sewing table for me and show me where he had packed all the pieces to the quilts and I got to work on finishing them. We went through my fabric bins and found scraps big enough to use for the border of the spindrift quilt and I also got started on finishing out the piecing on the scrap happy quilt. Here's what I have so far on scrap happyEach of the blocks and the sashing in the rows are sewn together, but I haven't yet ironed the seams or joined the rows. This is 5 rows and there are 15 rows total (and in that picture, it's laying on my queen size bed...it's gonna be huge!). And I don't think I ever posted a picture of what my edge fabric was going to be on this one, so here's that (Sierra helped pick it, I think she did a good job!)

I'm planning to have the scrap happy top completely done and ready for quilting by the end of the week. It'll be interesting to get the backing for that one just right, it's the biggest quilt I've ever made and I'm pretty sure I'll have to piece 3 strips of fabric together to cover the back. I'm also pretty sure I'm going to hand quilt this one. I can't come up with a quilt pattern that compliments the quilt and can be done somewhat easily on my machine. What I have in mind would require so much starting and stopping, I think it'd actually be harder on the machine. Still mulling this over though.

The middle of the spindrift quilt is completely done, once I get the borders on (which will only take me a day or two...I'll post about it when I do it) it will be ready to quilt. I am planning to do that one on the machine.


Quilt Step One: Planning
Quilt Step Two: Cutting Fabric, Preparing Machine
Quilt Step Three: Piecing The Quilt
Quilt: Piecing, Continued
Quilt: More Piecing
Quilt: Scrap Happy Blocks Pieced
Quilt: Spindrift Pieced
Quilt Step Four: Sashing
Quilt Step Five: Border

Tuesday, March 30, 2010

Quilt Step Four: Sashing

Disclaimer: I am in no way a quilting expert. I have learned solely from trial and error (emphasis on error) and reading on the internet. I have only made 4 quilt tops and have hand quilted 1 top and machine quilted 4 tops. I am not saying everything I do is the right way to do it, just sharing what I've picked up so far. You'll probably learn best by trial and error too ;-)

I'm finally ready to move past the piecing posts! Yesterday, I started the sashing on the Scrap Happy quilt. Sashing is fabric between the blocks. Because of the scrapiness (that's not a word, is it?) of this quilt and all the different colors I have going on, I wanted something very very plain for the sashing. Something that would let your eyes rest a little between each block. So I went with white fabric with small white flowers printed on it. Not too plain, but not distracting. Then for contrast, I picked black with a gray design on it for the sashing squares. The trick with sashing is that you can't just sew strips around all four sides of a block (at least, not easily). So, instead you sew a sashing strip to one side of all the blocks, then sew a sashing strip to a sashing block, and sew those in between each block. Clear as mud? Here it is in pictures:Then, when you have your rows sewn together, you have the sashing on all four sides of each block (this isn't really sewn, I still have to pick a fabric to make triangles out of and fill in the edges since these rows will be diagonal, not horizontal)
The other side of this is that I've put on my dual feed presser foot for sewing the rows together. If I had thought ahead at all, I would've used a different aperture on my camera and gotten the whole thing in focus, but that didn't happen, so this is what you get:A dual feed foot has another set of feed dogs (the part that moves your fabric along) on it, so that both the top and bottom layer of fabric are being fed by the machine. This enables my aversion to pinning (I know, an ironing AND a pinning aversion, what am I doing sewing??) by making it easier to move both pieces through at an equal pace. The dual feed can be kinda hard to get started with narrow seams (the fabric sometimes wants to skitter off to the side), so I don't feel like it's worth using on smaller pieces, but once I get to the point where I'm sewing large pieces of fabric together and trying to keep many seams lined up without stretching my fabric, it's nice to have to the dual feed foot on there. It's not a necessary thing, just something that came with the machine when I got it that makes my life a little easier.

With any luck, we'll start talking borders by next weekend.

Quilt Step One: Planning
Quilt Step Two: Cutting Fabric, Preparing Machine
Quilt Step Three: Piecing The Quilt
Quilt: Piecing, Continued
Quilt: More Piecing
Quilt: Scrap Happy Blocks Pieced
Quilt: Spindrift Pieced
Quilt Step Four: Sashing
Quilt Step Five: Border
Quilt: Choosing Batting
Quilt Step Six: The Quilt Sandwich

Sunday, March 28, 2010

Quilt-Last of the Piecing

Finished all the blocks for the Spindrift quilt today:
Then I laid them all out on the bed in the order that I want to sew them together:
Also washed, ironed and cut all my fabric for the sashing on the Scrap Happy quilt:
The next post (tomorrow, maybe Tuesday) will be all about sashing.

Monday, March 22, 2010

Scrap Happy Update

One last update on the Scrap Happy quilt piecing before I go back to a more step-by-step format.

On Saturday, we had a yucky cold front come through and it looked like this outside:So, while we were all sitting around in our PJs and staying in out of the cold and rain, it was a perfect time to sit down and finish out the Scrap Happy squares:
Now, I'm supposed to have 113 squares and somehow I managed to only end up with 110. I'm not sure if I just counted wrong somewhere (when you're cutting out over 1300 little rectangles, that could happen!) or if a certain 2 year old I know and love absconded with them, but either way, I need to cut and sew 3 more. Armed with a few squares, I headed off to the fabric store and picked out a fabric for my sashing (the fabric between squares). Just to get an idea of the overall look, I laid the sashing fabric out and laid squares on top of it.
So this is pretty much what the quilt is going to look like, only those black squares will be at the corner of every block. I like the little muted details on these fabrics:
I'm planning to pick a mostly black, with a thin white design on it for the triangles that will fill in along the edges of the quilt.

Tuesday, March 16, 2010

Yet Another Quilt Update

Making fabulous progress on the quilts. Could finish piecing the squares this week if I buckle down and work a little each evening. Having both girls around for spring break (and Sedona diving head first into the torrential three's) is slowing me down a bit.

Scrap Happy Quilt
We have everything assembled so that there are three pieces to sew together to make a block. Since I took the pictures below, I have finished half of the blocks (I'm making 113 total, 56 are done). Here are all the pieces

And here's what one block put together will look like (this one isn't sewn):

So far, I've managed to use 13 different fabrics in each block. Hoping I can keep that up.

Spindrift Quilt
I finished all the pinwheels!

Everything else on this quilt will be easy, there are no more small pieces and no sashing. Here is what a block will look like when it's put together:

The next update will get back into an instructional format as I finish up squares, do sashing and borders, then quilting and binding.

Monday, March 8, 2010

Quilt-More Piecing


I currently feel like I'm in a special quilter's version of Dante's Inferno...I've moved from the "ironing" level of purgatory into the deeper, darker, pinwheel level of purgatory. All pinwheels, all the time...bwa ha ha ha ha! This is the point where I would typically lose steam and quit working for a few months, but I've already laid bare my quilting plans on the blog, so I can't quit now. Thank you for holding me accountable, internets.

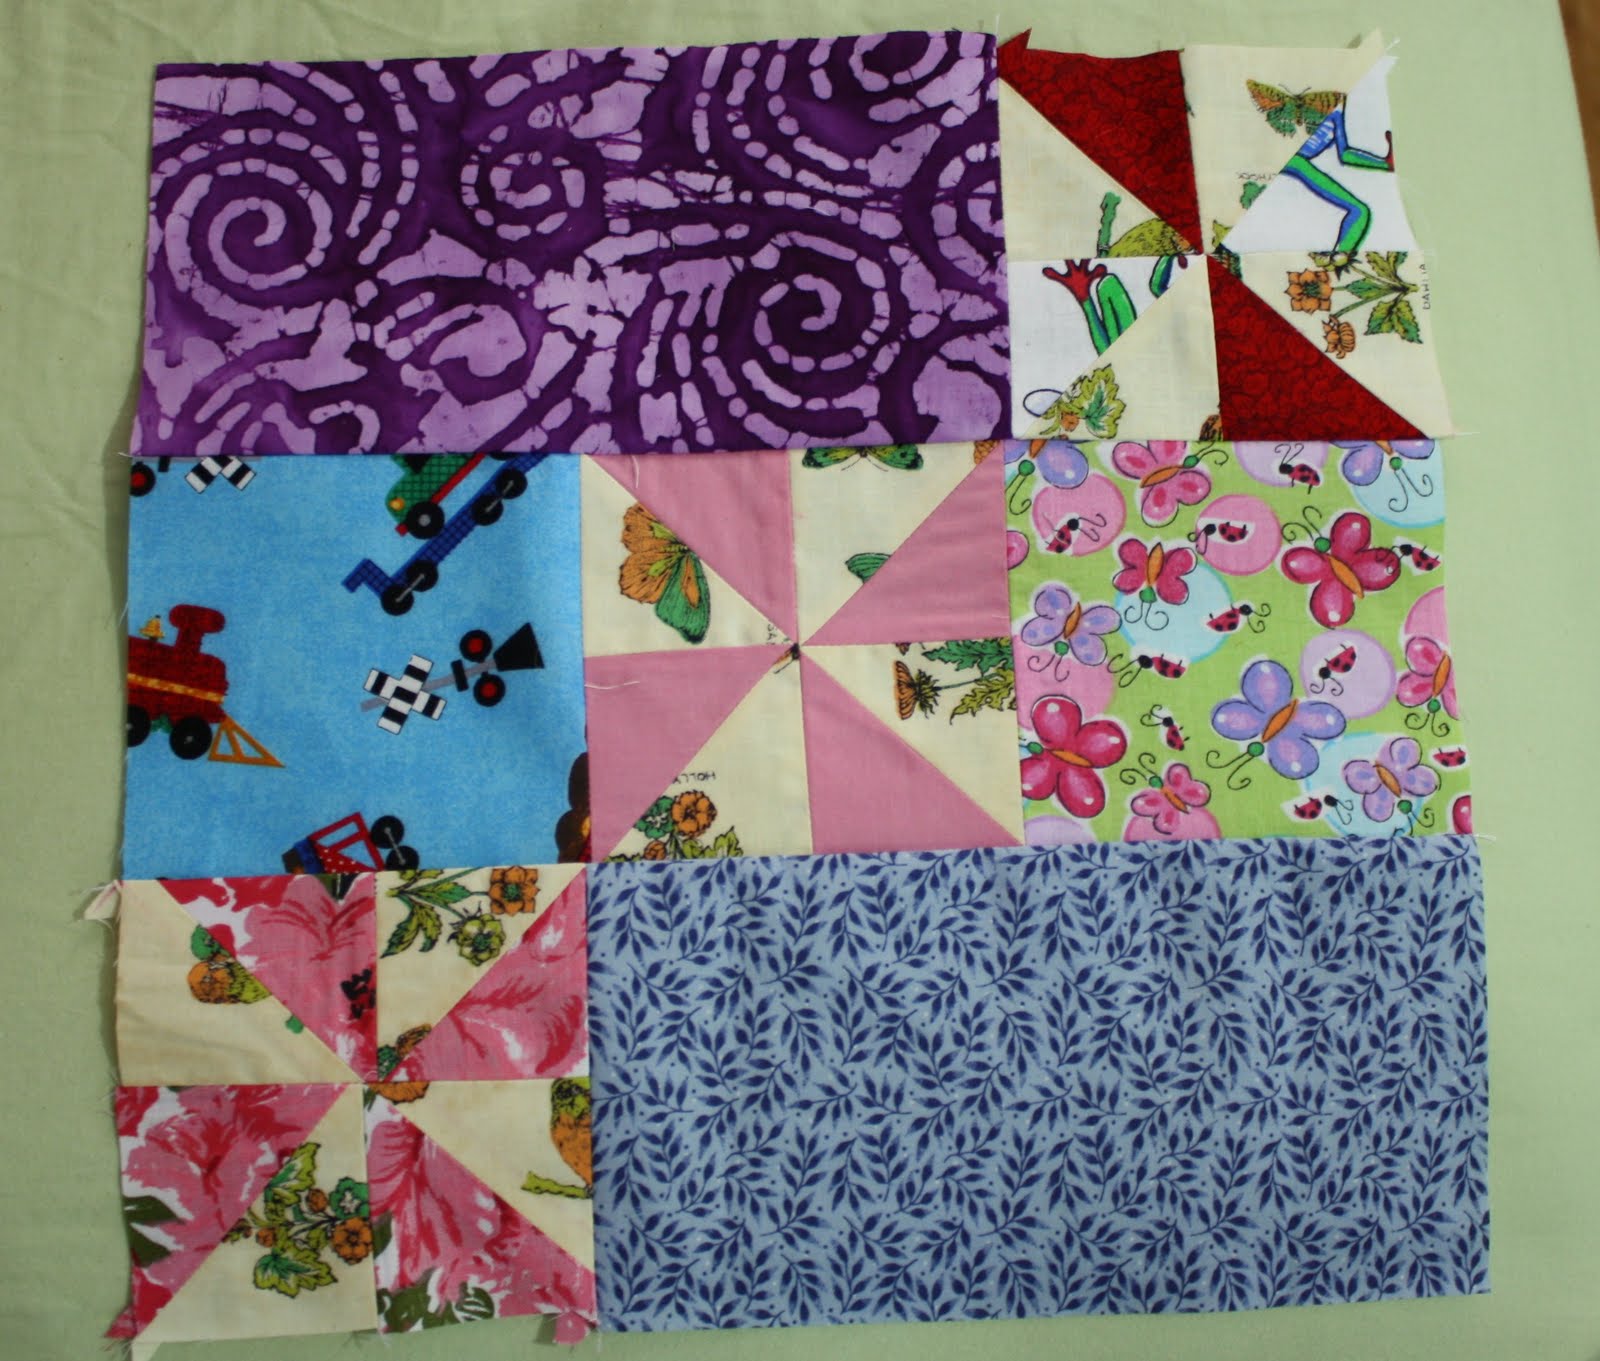
I've also realized there's an important bit of piecing knowledge that I haven't shared and feel the need to clarify: sewing is like biomagnification. What? No one else here is a science nerd? Biomagnification is the reason we worry about mercury in fish: fish A has mercury in it. Fish B is bigger and eats 5 of fish A, so it now has 5A mercury. Fish C is even bigger and eats 5 of fish B, so it now has 25A mercury. The problem keeps getting bigger (so only eat big fish in moderation). Sewing has a similar problem to biomagnification: when you make mistakes, they will be magnified later if you don't correct them. If you are supposed to sew a 1/4" seam and it's slightly less than 1/4", your next seam could be off even more and the next one off more than that. To avoid this, once you start matching up pieces, you should be aligning SEAMS (where they're involved), not edges. For instance, on my pinwheels, when I put the top half and the bottom half together, I match up the seams and often find the edges do not match (they are within the 1/4" seam allowance though--I sew 1/4" from the edge that sticks out the most). If I were to match up the edges instead, none of my corners would meet up neatly. When I get sloppy about it, I get something like this:
When I'm careful, it comes out more like this (sometimes):
I am definitely no seamstress, I have a lot to learn. Sierra and Sedona each have quilts my sister-in-law made them (they LOVE those things!) and each block is perfectly lined up, every corner meets just perfectly. I don't know how she does it. Her hand quilting is perfectly straight too...I DO know how she does that (puts a piece of tape on the quilt to give her a straight line to follow), but when I tried to duplicate it, I still couldn't make ONE stitch follow the tape, much less a whole line of them. I just need lots more practice, I suppose.
Related Posts Plugin for WordPress, Blogger...