


Now that I have my quilt sandwich assembled, it's time for me to quilt this (seemingly bigger each day) quilt. This is only the second time I've hand quilted anything, but it's already much easier this time around and I can tell my stitches are getting a lot better.
The first thing I had to do was decide what pattern I wanted to quilt. I wanted to keep it simple and relatively sparse both so it would go quickly and so I could avoid as many seam allowances as possible (it's a lot harder to quilt wherever there's a seam allowance because you have extra thicknesses of fabric). For the quilt batting I'm using, the packaging informs me that the ideal quilting distance is 2-4 inches apart, so I thought about what I wanted to do and then made sure that design wouldn't be too spaced out.
I also needed to get all of my stuff together. I use Gutermann quilting thread for hand quilting, and quilting needles (also called "betweens"). I keep scissors close by along with a thimble (though I don't use it the whole time...they drive me crazy) and one of those rubber grips used to help open jars to help me grip the needle if I need to pull it through a thicker section. The last thing I have on hand is some sort of tape that won't leave sticky residue on the fabric.
Then, it was time to quilt. As always, start in the center and work your way out. Here is my center square with the hoop already on the quilt (making sure the backing fabric didn't have wrinkles in it). The pink threads you see are the basting lines I put in to hold everything together temporarily (I will just cut those out when I'm done quilting), the white threads are my quilting lines. I chose white because it matches both the top and the bottom of the quilt. My technique's not quite good enough to make the quilting part of the quilt design yet--I just want it to blend in.
 One thing about quilting that was always a mystery to me was how to do the quilting without have all of the thread knots hanging out. My sister-in-law explained it to me in an email and with my mom's help, I finally figured out the technique. You start out by tying the knot in the end of your thread.
  Then you put the needle only through the top layer of the quilt just a short distance away from where you want to start and push the end of the needle up through the place you really want to start.
  Pull the thread until the knot pulls through the first hole, but not the second one.
 Now you're ready for the quilting stitches. Hold the needle in your dominant hand with your other hand under the quilt. With the needle vertical, push it through all layers of fabric until you barely feel the point on the bottom side
 then rock the needle over horizontal to the fabric and push it through.
 Most people use a thimble on the finger that they use to push the needle. Thimbles drive me batty though, so I only use one if I'm pushing through a seam allowance (which is hard to do). Otherwise, I tend to just push the needle with my fingernail. This wouldn't work if I was quilting for hours at time (it would get to be too much stress on my nail and start to hurt), but I like frequent breaks anyway, so it usually works fine.
Pull the thread through and voila! (random pet-peeve of mine..."wah-la" is not a word) your first quilting stitch.
 I still do my stitches separately, but you can keep up this process (when you rock the needle to the side, turn it back vertical as soon as the point comes through the top and do another stitch) so you get several done at once. You'll also notice my oh so lovely princess tape. I think I've briefly mentioned this trick that I saw my sister-in-law using, it just gives you a guide for making a straight line of stitches. Medical tapes work well because they don't leave the fabric sticky. The last time we bought tape was to bandage up a crushed finger injury of Sierra's (note to all the kiddies out there...sticking your fingers in the hinge side of an open door is a BAD idea), so what I have is princess themed.
At the end of your line of stitches (or the end of your thread, whichever comes first), you will also need to hide an ending knot. Make sure you stop when there's still enough thread left to tie it off. Wrap your thread around the needle
 then pull the needle through to make a knot.
 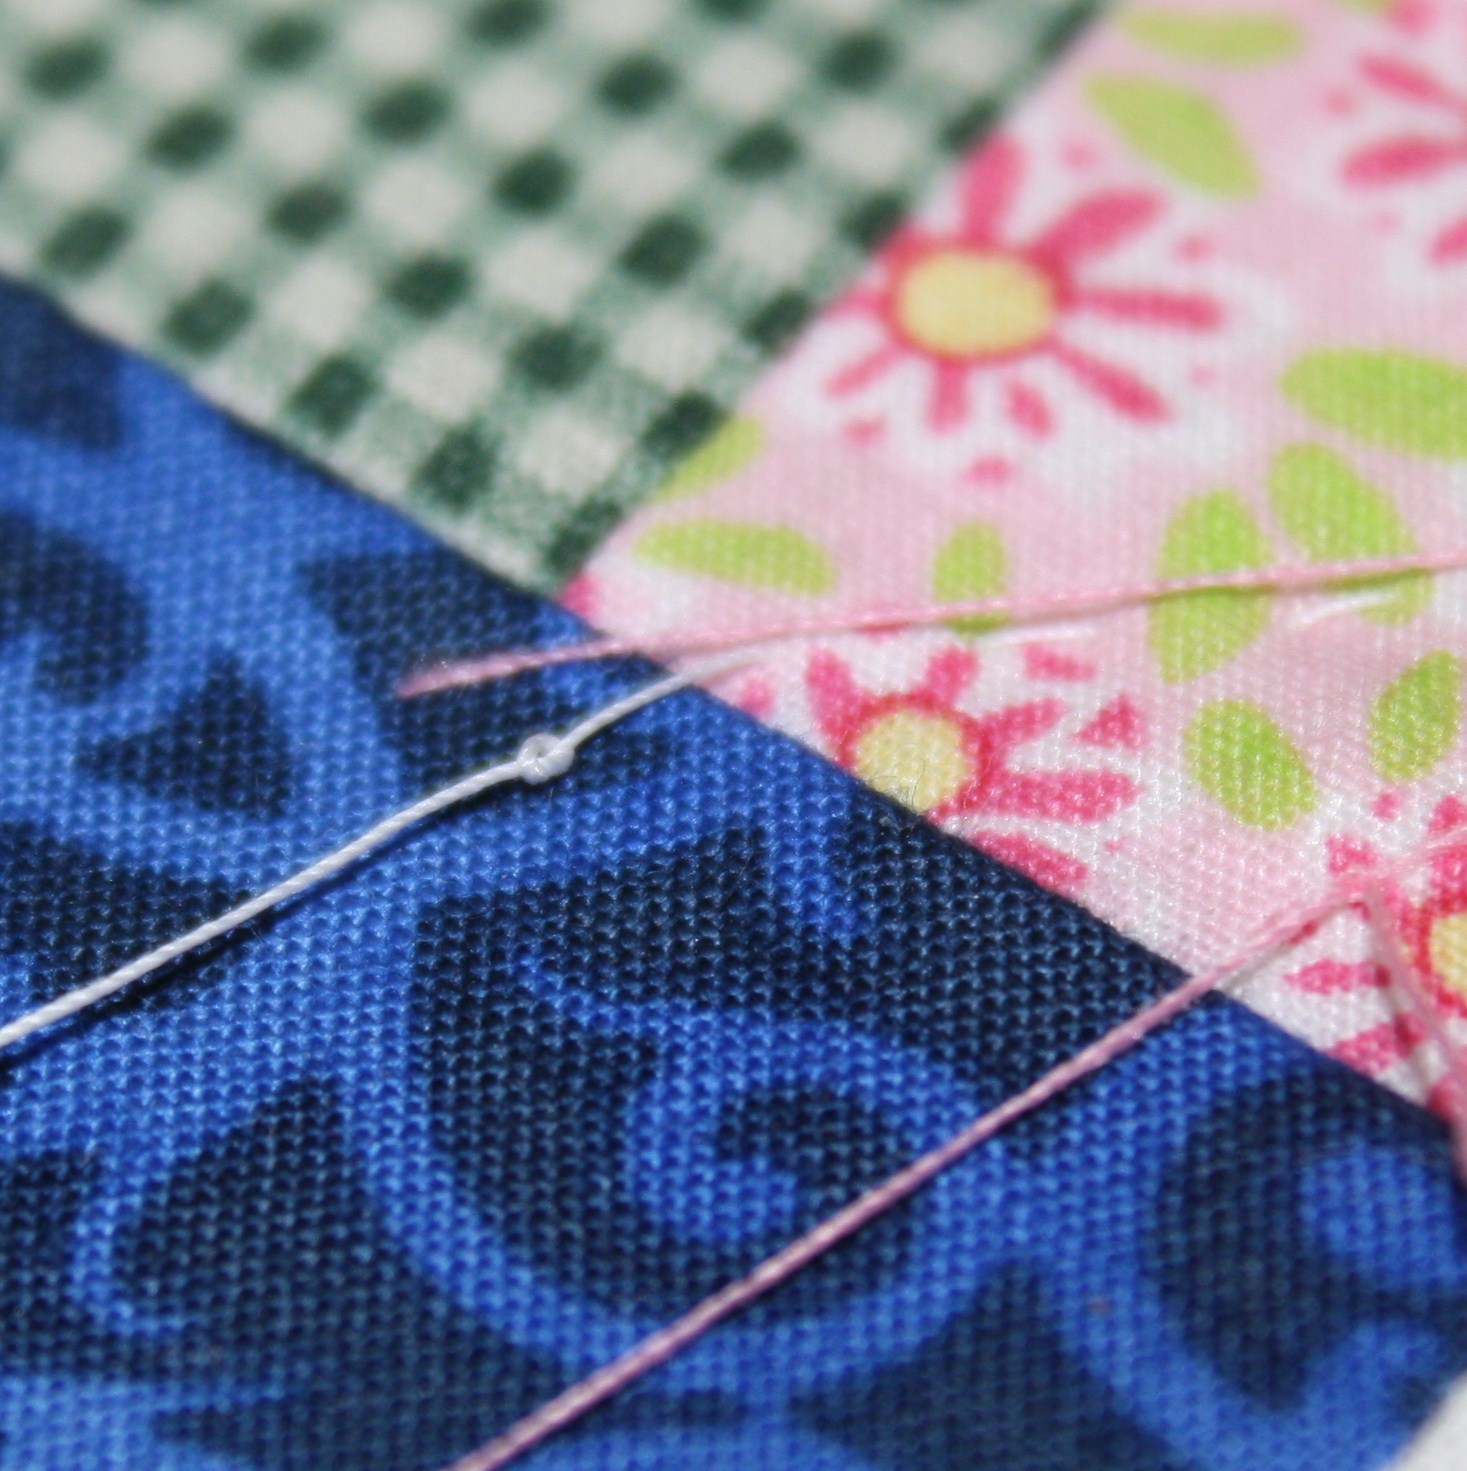 Just like when you started, stick the needle through the top part of the quilt only and push the point back up a short distance from where you're stopping.
  Pull until your knot is pulled through the fabric
 then cut off the thread close to the fabric.
The design I ended up choosing (actually, Josh came up with it because I was having trouble coming up with something I was happy with) looks like this on all of the white sashing strips
 plus I'm doing an "x" in all of the center squares. Right now I have 4 squares done, only 109 to go...yay.
I also got the batting for the other quilt in the mail yesterday, so I will be starting that next week. It will be machine quilted, so I'll do another post about setting up and doing that.
Quilt Step One: Planning
Quilt Step Two: Cutting Fabric, Preparing Machine
Quilt Step Three: Piecing The Quilt
Quilt: Piecing, Continued
Quilt: More Piecing
Quilt: Scrap Happy Blocks Pieced
Quilt: Spindrift Pieced
Quilt Step Four: Sashing
Quilt Step Five: Border
Quilt: Choosing Batting
Quilt Step Six: The Quilt Sandwich
Quilt Step Seven: Hand Quilting
2 comments:
My pet peeve - viola!
Suddenly yelling out names of instruments is just weird.
ROFL!!! That goes along with the wah-la I see typed out so much...I guess a lot of people just haven't seen it in print.
Post a Comment